


Elastcisearch와 Kibana를 다운로드 합니다.8.1.0 버전을 다운 받습니다.
- https://www.elastic.co/downloads/past-releases#elasticsearch
- https://www.elastic.co/downloads/past-releases#kibana
운영체제에 알맞은 플랫폼을 설치합니다.
압축 해제
다운로드 받은 파일을 압축 해제 합니다.
Desktop에 es8 폴더를 만드고 해당 위치로 압축해제한 폴더를 이동시킵니다.


폴더명을 아래와 같이 변경합니다.


터미널 창을 열고 해당 위치로 이동합니다.


cd Desktop/es8
하위 폴더에 잘 위치해 있음을 확인합니다.


ls
Elasticsearch 설치
elasticsearch로 이동합니다.


cd elasticsearch
설치를 진행합니다.


bin/elasticsearch
설치가 완료되면 비밀번호, 토큰, SHA-256 인증서가 생성됩니다.
해당 내용을 복사하여 보관합니다.


✅ Elasticsearch security features have been automatically configured!
✅ Authentication is enabled and cluster connections are encrypted.

ℹ️  Password for the elastic user (reset with `bin/elasticsearch-reset-password -u elastic`):
  yOU9IQPJuRI_L*QDAVpL

ℹ️  HTTP CA certificate SHA-256 fingerprint:
  37beef17dd24ac7394407dad395a2a07ab39df7dd641a7efcc1ebc33a952538c

ℹ️  Configure Kibana to use this cluster:
• Run Kibana and click the configuration link in the terminal when Kibana starts.
• Copy the following enrollment token and paste it into Kibana in your browser (valid for the next 30 minutes):
  eyJ2ZXIiOiI4LjEuMCIsImFkciI6WyIxOTIuMTY4LjkuMTc0OjkyMDAiLCIxOTIuMTY4LjIxOS4xMDg6OTIwMCJdLCJmZ3IiOiIzN2JlZWYxN2RkMjRhYzczOTQ0MDdkYWQzOTVhMmEwN2FiMzlkZjdkZDY0MWE3ZWZjYzFlYmMzM2E5NTI1MzhjIiwia2V5IjoiNUpzQ0Y0d0JKcUQxYTFlY1RFcXY6dlNYOGpialVSTWFkR1VQLVFCRkZSQSJ9

ℹ️  Configure other nodes to join this cluster:
• On this node:
  ⁃ Create an enrollment token with `bin/elasticsearch-create-enrollment-token -s node`.
  ⁃ Uncomment the transport.host setting at the end of config/elasticsearch.yml.
  ⁃ Restart Elasticsearch.
• On other nodes:
  ⁃ Start Elasticsearch with `bin/elasticsearch --enrollment-token <token>`, using the enrollment token that you generated.
설치가 완료 되었습니다!!!🎉
브라우저를 실행하고 아래주소로 이동합니다.
https://localhost:9200/_cluster/health
그러면 로그인 창이 나옵니다.
아이디는 elastic이고 Password는 elasticsearch를 설치하면서 생성된 비밀번호를 입력하면 됩니다.


ID: elastic
Password: dDjx9rv7bm0ZybCZLFJl
로그인까지 완료하면 아래와 같은 응답의 형태를 받을 수 있습니다.


Kibana 설치
macOS에는 Gatekeeper라는 보안 기능이 포함되어 있는데, 이것은 키바나가 시동을 거는 것을 막습니다.
보안기능을 해제합니다.
터미널에서 새창을 열어서 kibana 폴더로 이동합니다.


cd Desktop/es8/kibanaxattr -d -r com.apple.quarantine ~/Desktop/es8/kibana
kibana를 설치합니다.


bin/kibana
설치가 완료되면 아래와 같이 주소가 생성 됩니다.


Kibana 로그인 하기
해당 도메인으로 이동합니다.
그러면 아래와 같은 페이지를 만나게 됩니다.
여기에 Elasticsearch에서 생성된 토큰을 입력합니다.
시간이 다소 소요될 수 있습니다.


완료되면 아래와 같은 페이지가 나옵니다.


로그인 합니다.
ID: elastic
Password: dDjx9rv7bm0ZybCZLFJl

로그인 완료!


Dev Tools로 이동!
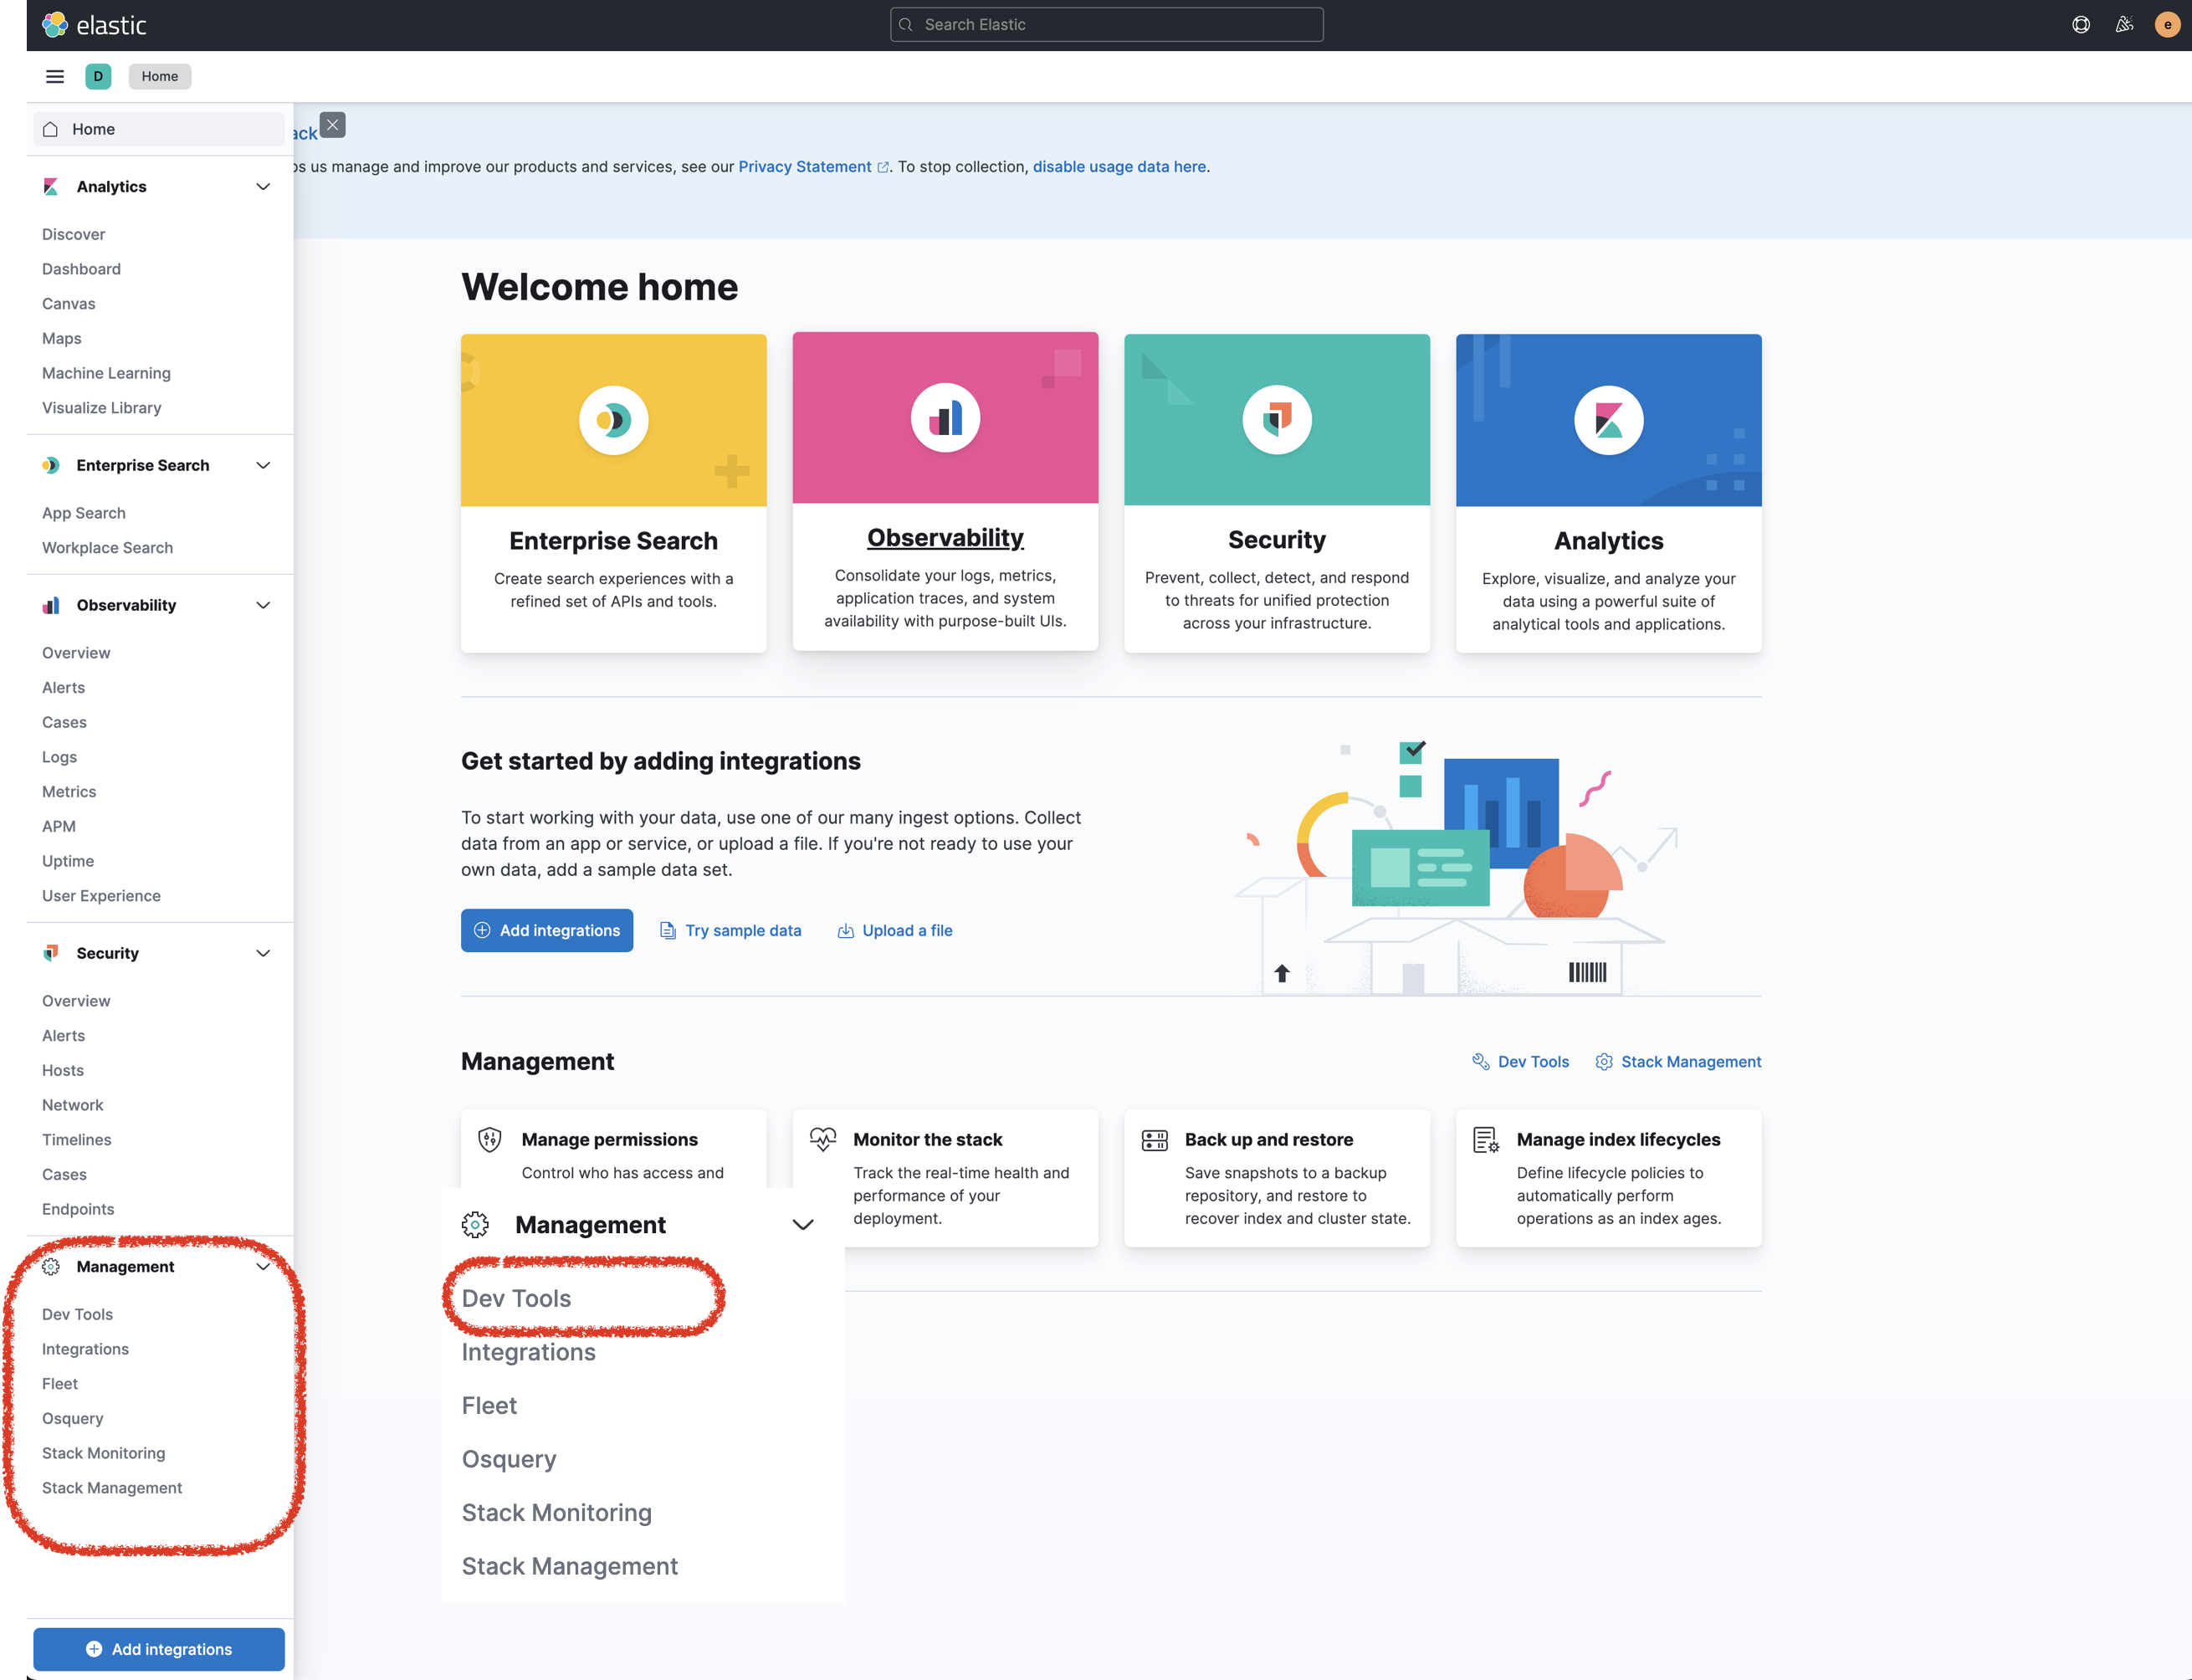

여기서 작업을 진행할 수 있습니다.
물론 Postman을 사용해도 됩니다.^^


'데이터베이스 > 0 + Elasticsearch' 카테고리의 다른 글
| [Elasticsearch] Elasticsearch 검색 심화 풀 텍스트 쿼리(Full Text Query) (1) | 2023.12.28 |
|---|---|
| [Elasticsearch] 초간단 REST API를 사용한 Elasticsearch CRUD (1) | 2023.12.28 |
| [Elasticsearch] 초간단 REST API를 사용한 Elasticsearch CRUD (0) | 2023.12.13 |
| [Elasticsearch] 핵심만 콕콕 Elasticsearch 기본 개념 (0) | 2023.12.07 |