
728x90
반응형
[JUnit5] 환경변수 조건에 따라 테스트 실행하는 방법

환경변수 조건을 만족하는 경우에 테스트 실행
환경변수에 따라 테스트를 실행하는 코드를 작성해보겠습니다.
환경변수 설정
저는 macOS를 사용하고 있고 zsh를 사용하고 있습니다.
$ vi ~/.zshrc

파일을 열고 export TEST_ENV=LOCAL 를 입력합니다.
# If you come from bash you might have to change your $PATH.
# export PATH=$HOME/bin:/usr/local/bin:$PATH

# Path to your oh-my-zsh installation.
export ZSH="/Users/jangsea-ung/.oh-my-zsh"
export PATH=/opt/homebrew/bin:$PATH
export TEST_ENV=LOCAL

# Set name of the theme to load --- if set to "random", it will
# load a random theme each time oh-my-zsh is loaded, in which case,
# to know which specific one was loaded, run: echo $RANDOM_THEME
# See https://github.com/ohmyzsh/ohmyzsh/wiki/Themes
ZSH_THEME="agnoster"

# Set list of themes to pick from when loading at random
# Setting this variable when ZSH_THEME=random will cause zsh to load
# a theme from this variable instead of looking in $ZSH/themes/
# If set to an empty array, this variable will have no effect.

저장한 후 IDE를 재실행 합니다.
테스트 코드를 작성합니다.
import org.junit.jupiter.api.*;

import static org.junit.jupiter.api.Assertions.*;
import static org.junit.jupiter.api.Assumptions.*;

class StudyTest {

    @Test
    @DisplayName("조건에 따라 테스트 실행하기")
    void assumptionsTest() {
        // 특정 조건을 만족하는 경우에만 테스트를 실행하는 방법
        String testEnv = System.getenv("TEST_ENV"); // 환경변수를 읽어옴
        System.out.println(testEnv);
        Study actual = new Study(10);
        assumingThat("LOCAL".equalsIgnoreCase(testEnv), () -> {
            assertAll(
                    () -> assertTrue(actual.getLimit() > 10),
                    () -> assertTrue(actual.getStatus().equals(StudyStatus.DRAFT))
            );
        });
    }
}
테스트 코드를 실행 합니다.
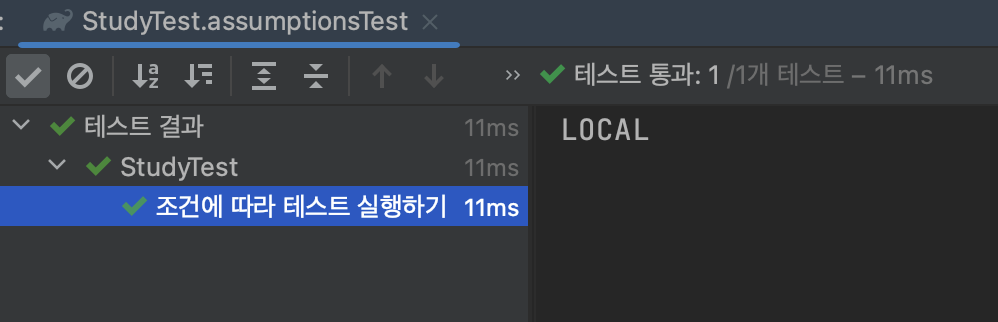
조건이 맞지 않는다면 아래와 같은 결과를 출력합니다.

어노테이션 활용
환경 변수(@EnabledIfEnvironmentVariable)
어노테이션을 사용하여 코드를 작성할 수 있습니다.
@Test
@DisplayName("조건에 따라 테스트 실행하기")
@EnabledIfEnvironmentVariable(named = "TEST_ENV", matches = "LOCAL")
void assumptionsTest() {
    // 특정 조건을 만족하는 경우에만 테스트를 실행하는 방법
    String testEnv = System.getenv("TEST_ENV"); // 환경변수를 읽어옴
    System.out.println(testEnv);
    Study actual = new Study(10);
    assertAll(
            () -> assertTrue(actual.getLimit() > 10),
            () -> assertTrue(actual.getStatus().equals(StudyStatus.DRAFT))
    );
}
OS 조건(@EnabledOnOs)
OS에 따라 동작하는 테스트 코드를 작성할 때는 다음과 같은 어노테이션을 이용할 수 있습니다.
@Test
@DisplayName("조건에 따라 테스트 실행하기")
@EnabledOnOs({OS.MAC, OS.LINUX})
void testByOS() {
    // .. 테스트 코드 .. //
}
JRE 조건(@EnabledOnJre)
JRE에 따라 동작하는 테스트 코드를 작성할 때는 다음과 같은 어노테이션을 이용할 수 있습니다.
@Test
@DisplayName("조건에 따라 테스트 실행하기")
@EnabledOnJre({JRE.JAVA_11})
void testByJRE() {
    // .. 테스트 코드 .. //
}
참고
728x90
반응형
'테스트 > 0+ JUnit' 카테고리의 다른 글
| [JUnit] 회원가입 API 컨트롤러, 서비스, 리포지토리 테스트 예제 (5) | 2023.06.09 |
|---|---|
| [JUnit5] 인스턴스 테스트와 테스트 순서대로 실행하는 방법 (0) | 2023.05.17 |
| [JUnit5] 테스트 인자 값 타입 변환하는 방법 (1) | 2023.05.17 |
| [JUnit5] Assertions 기본 사용법 (0) | 2023.05.05 |
| [JUnit5] JUnit5 기본 어노테이션 (0) | 2023.05.04 |